The Basics of Celestial Navigation, Part 1: The Math That Makes the World Go Round
How a single angle measured in the sky tells you how far you are from a point on Earth.

- Introduction: why we want a backup to GPS
- Part 1: The math that makes the world go round (you are here)
- Part 2: Turning sunshine into math (working a Sun sight)
- Part 3: Connecting the dots (plotting a running fix)
- Part 4: High noon, low math (latitude by noon sight)
- Part 5: Finding the second star on the right (identifying stars and planets)
- Part 6: The Sun clocked out, but the math didn’t (working star and planet sights)
- Part 7: Three lines walk into a bar (plotting a three-body fix)
I used to think that celestial navigation relied on either advanced mathematics or witchcraft. You take this complicated looking device to stare up at the sky and then, using cryptic writing and ancient tomes you divine your position. I couldn’t completely rule out the involvement of chicken bones somewhere in the process. But it turns out that it's really much simpler than that. You need to measure one thing and note the time of day. Then using your ability to add, subtract, and flip through two books you can identify your position. Before we get to that process, though, it's worth taking a step back and looking at the math and science behind the process. That's what we're going to cover here. My 8th grade science teacher would be so proud.
Longitude
Let’s start by reviewing how we describe a position on Earth. We use two numbers: longitude and latitude. Most of us are familiar with the lines on a globe, but understanding what those lines represent will make the rest of this easier to follow.
Start with longitude. Picture yourself looking down on the North Pole. The lines radiating out from it are meridians. The prime meridian, our 0° reference, runs through Greenwich, England, because some very important people got together and decided it did. Longitude measures the angle east or west from that reference, up to 180° in either direction.
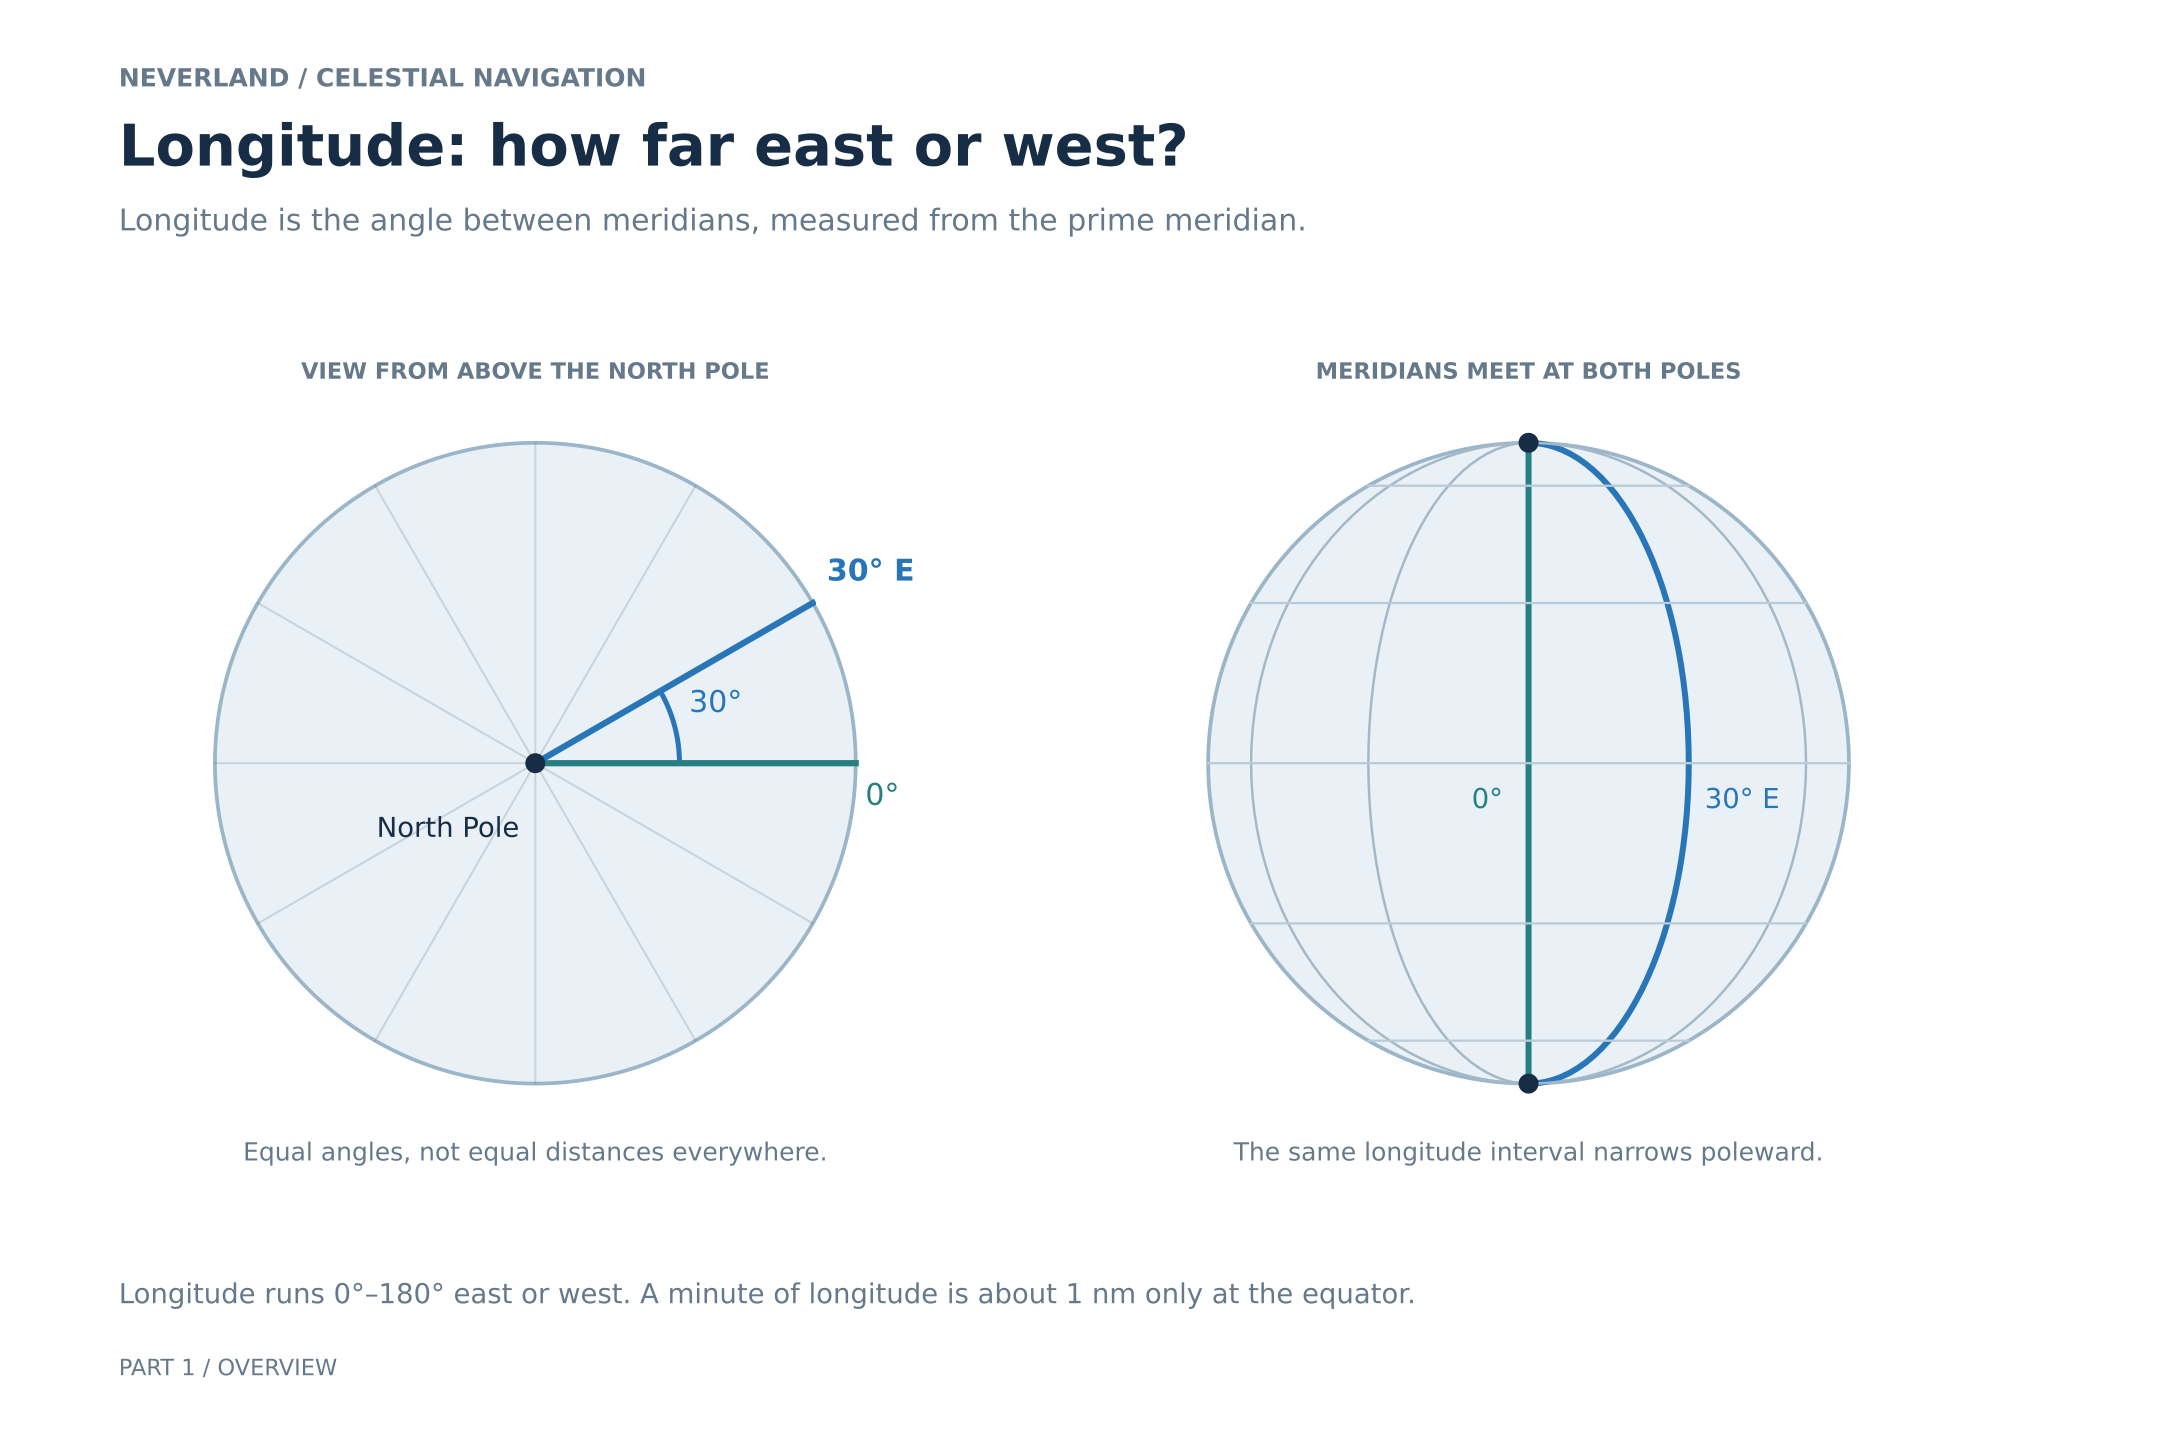
In the left-hand view, the angle between Greenwich's meridian and the marked meridian is 30°. That gives us 30° east longitude.
Latitude
Latitude tells us how far north or south we are from the equator. The equator is 0°, the North Pole is 90° north and the South Pole is 90° south. Lines of equal latitude circle Earth and are called parallels.
It's easy to look at a globe and think about latitude as a series of evenly spaced slices through Earth, like cutting a tomato. The problem with that picture is that equal-thickness slices do not represent equal steps in latitude.
In our simplified, spherical Earth, latitude is an angle at Earth's center, measured north or south from the equatorial plane. Equal steps in that angle mark equal distances along the curved surface, not equal heights inside the globe. The spacing between the imagined slice planes gets smaller toward the poles.
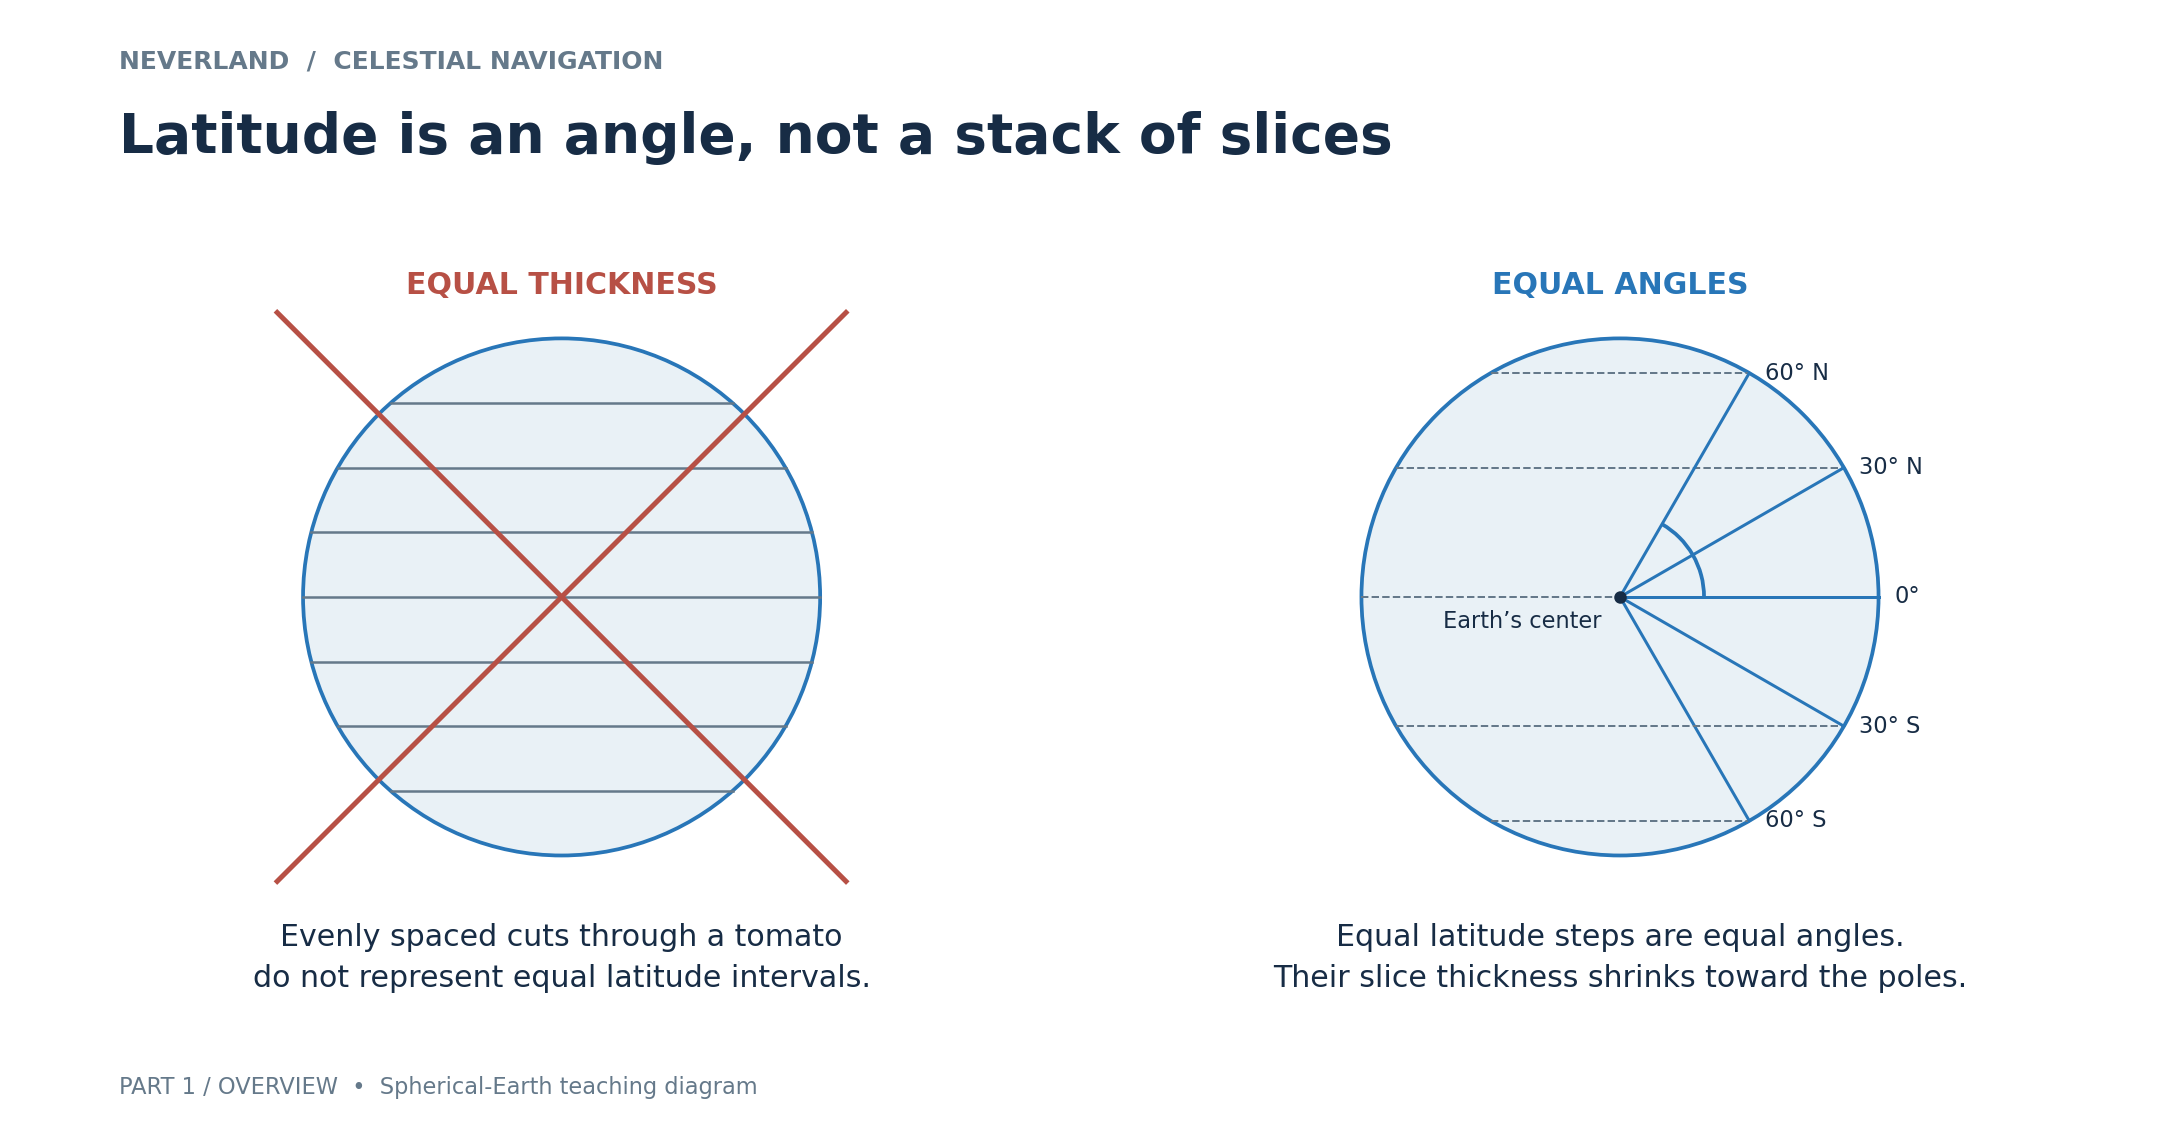
There is nothing wrong with imagining a slice parallel to the equator: its edge does trace a latitude parallel. The mistake is assuming that a stack of equally thick slices gives us equally spaced degrees of latitude.
Degrees minutes and nautical miles
Each degree is divided into 60 minutes of arc, written 60′. Those are angle measurements, not minutes on a clock. On our spherical-Earth model, one minute of latitude corresponds to one nautical mile along the surface. That makes one degree of latitude 60 nautical miles. For reference, one nautical mile is 1.852 kilometers, or 1.151 statute miles, the ordinary land miles.
Turning an angle into a distance
The latitude diagram makes the relationship easier to see. A line from Earth's center to a point at 40° north makes a 40° angle with the equatorial plane. Follow the curved surface northward from the equator and you cover the corresponding arc.
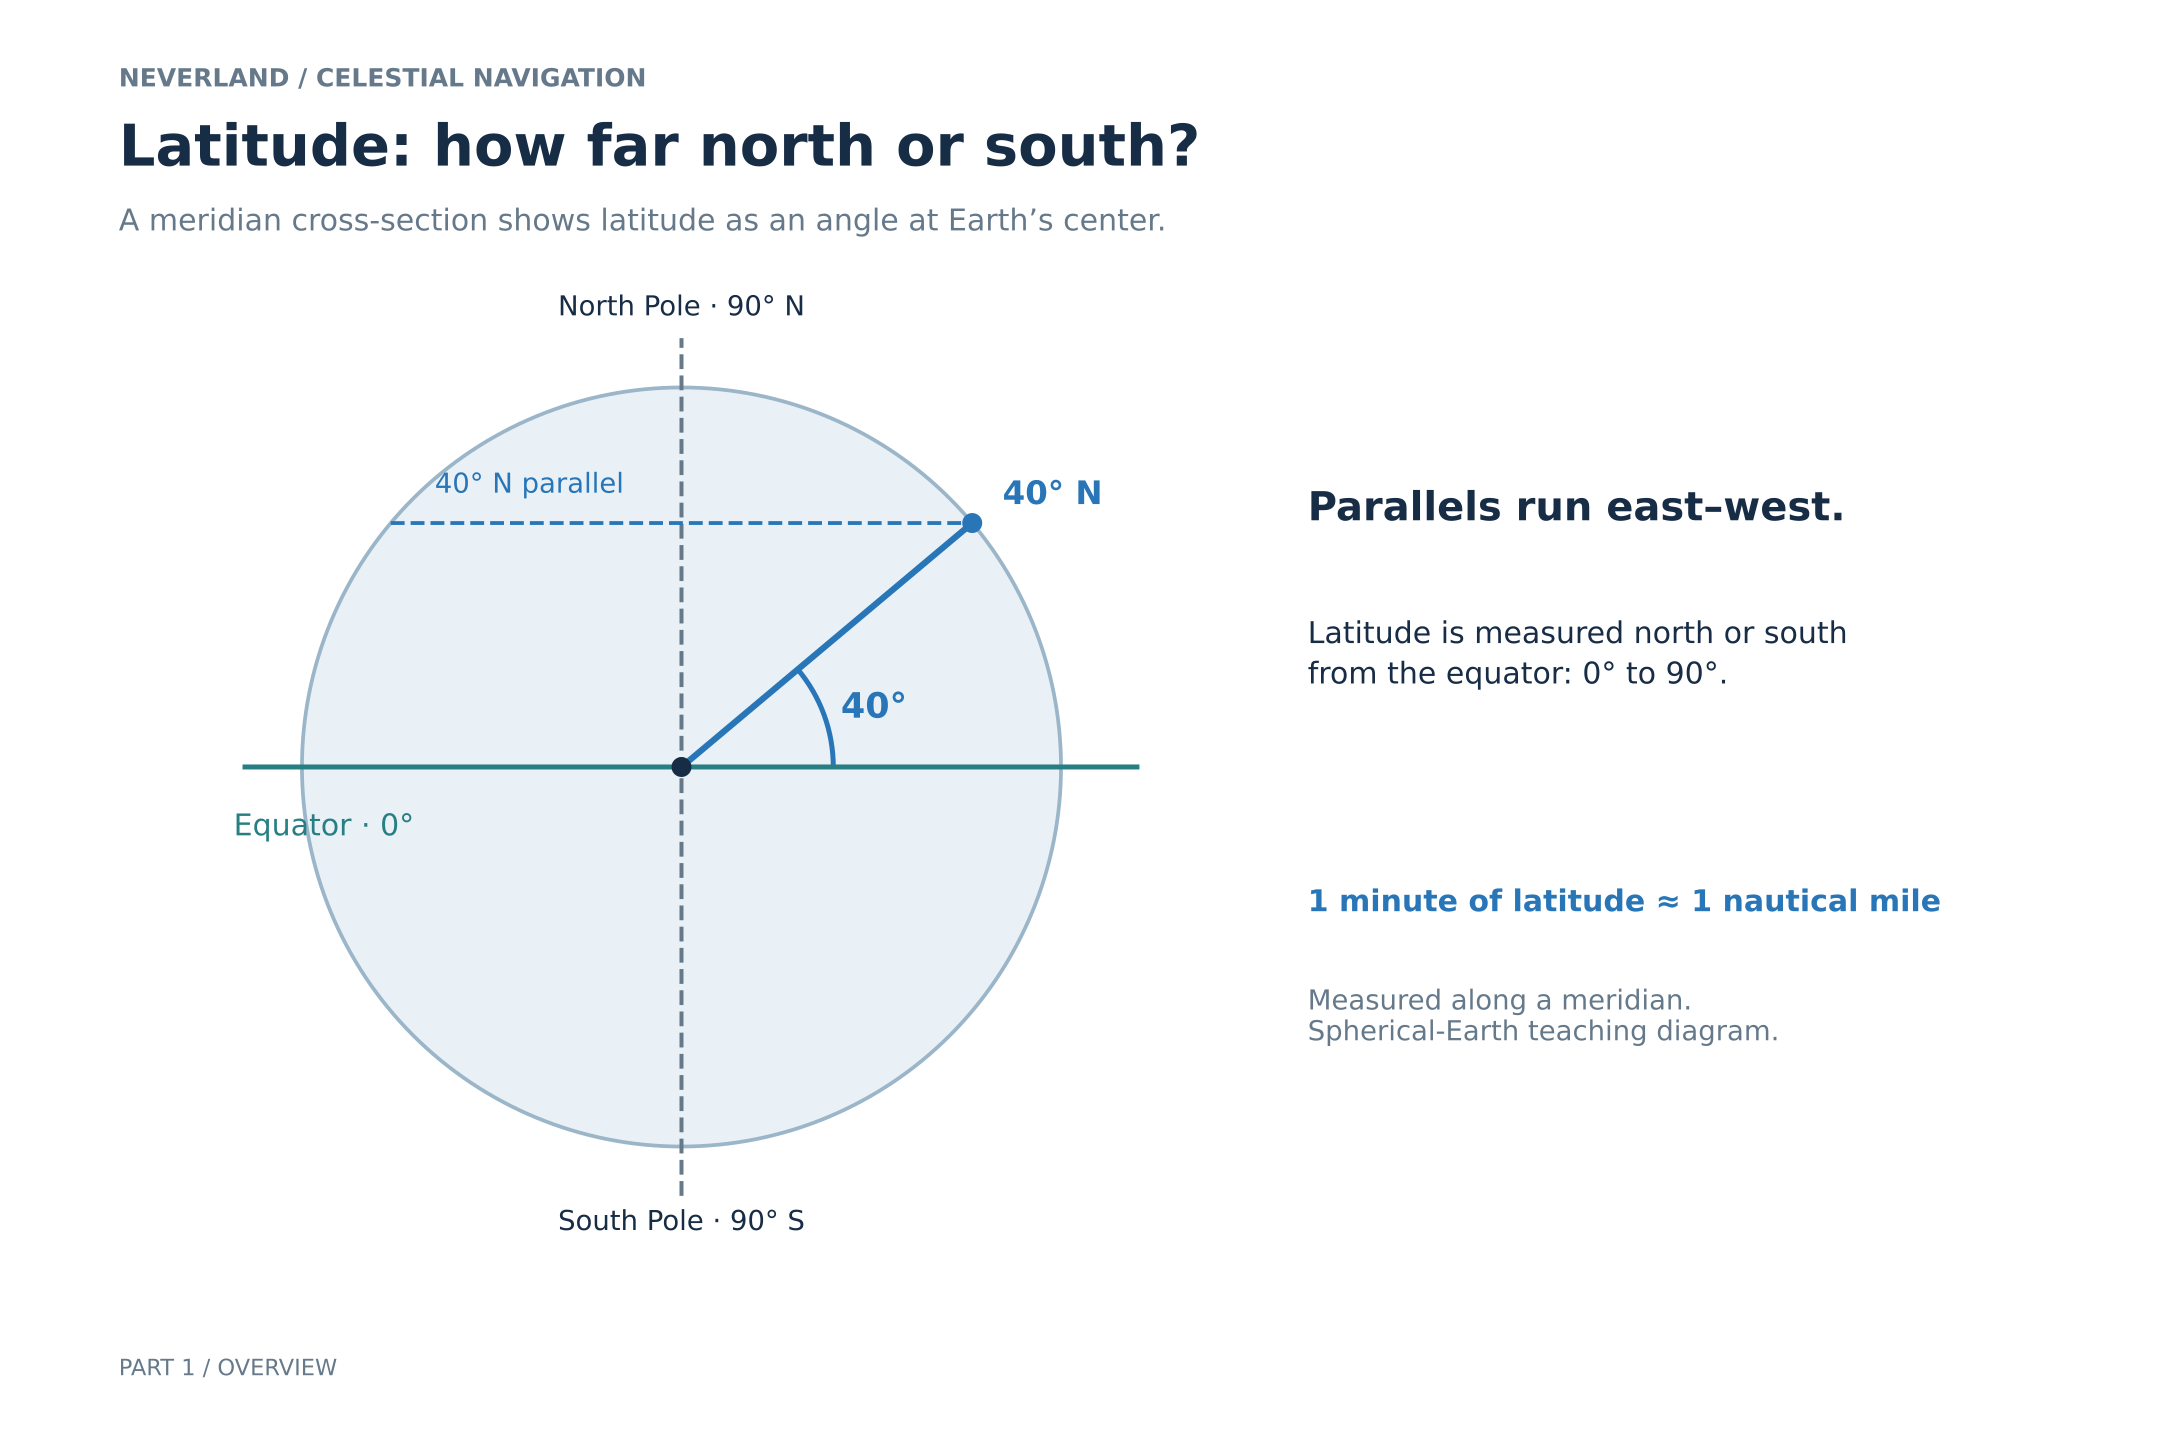
This is why nautical miles are so useful here. One minute of angle at Earth's center corresponds to about one nautical mile along a great-circle arc, the kind made by a plane passing through Earth's center.
Don't apply that rule blindly to longitude. A minute of longitude is about a nautical mile at the equator, but the meridians converge toward the poles and the distance between them shrinks. Latitude and longitude together identify our position where a parallel and a meridian cross.
The geographical position of the Sun
At any instant, there is one point on Earth where the Sun is directly overhead. That is the Sun's geographical position, or GP. We are referring to a position on Earth's surface, rather than the Sun's location out in space.
The Nautical Almanac lets us locate the GP for the date and time of a sight. Its north-or-south coordinate is called declination. We use a different term because latitude describes a position on Earth, while declination describes an object's angle north or south of the celestial equator. You can picture the celestial equator as Earth's equatorial plane extended into the sky. For the Sun, its declination is also the latitude of its GP.
The other coordinate is Greenwich Hour Angle, or GHA, measured westward from Greenwich through 0°–360°. As Earth rotates, the Sun's GHA makes one full circuit in an apparent solar day, roughly 24 hours. It is not exactly 24 uniform clock hours each day, so we use the almanac rather than assume a perfectly steady rate.
How high is the Sun
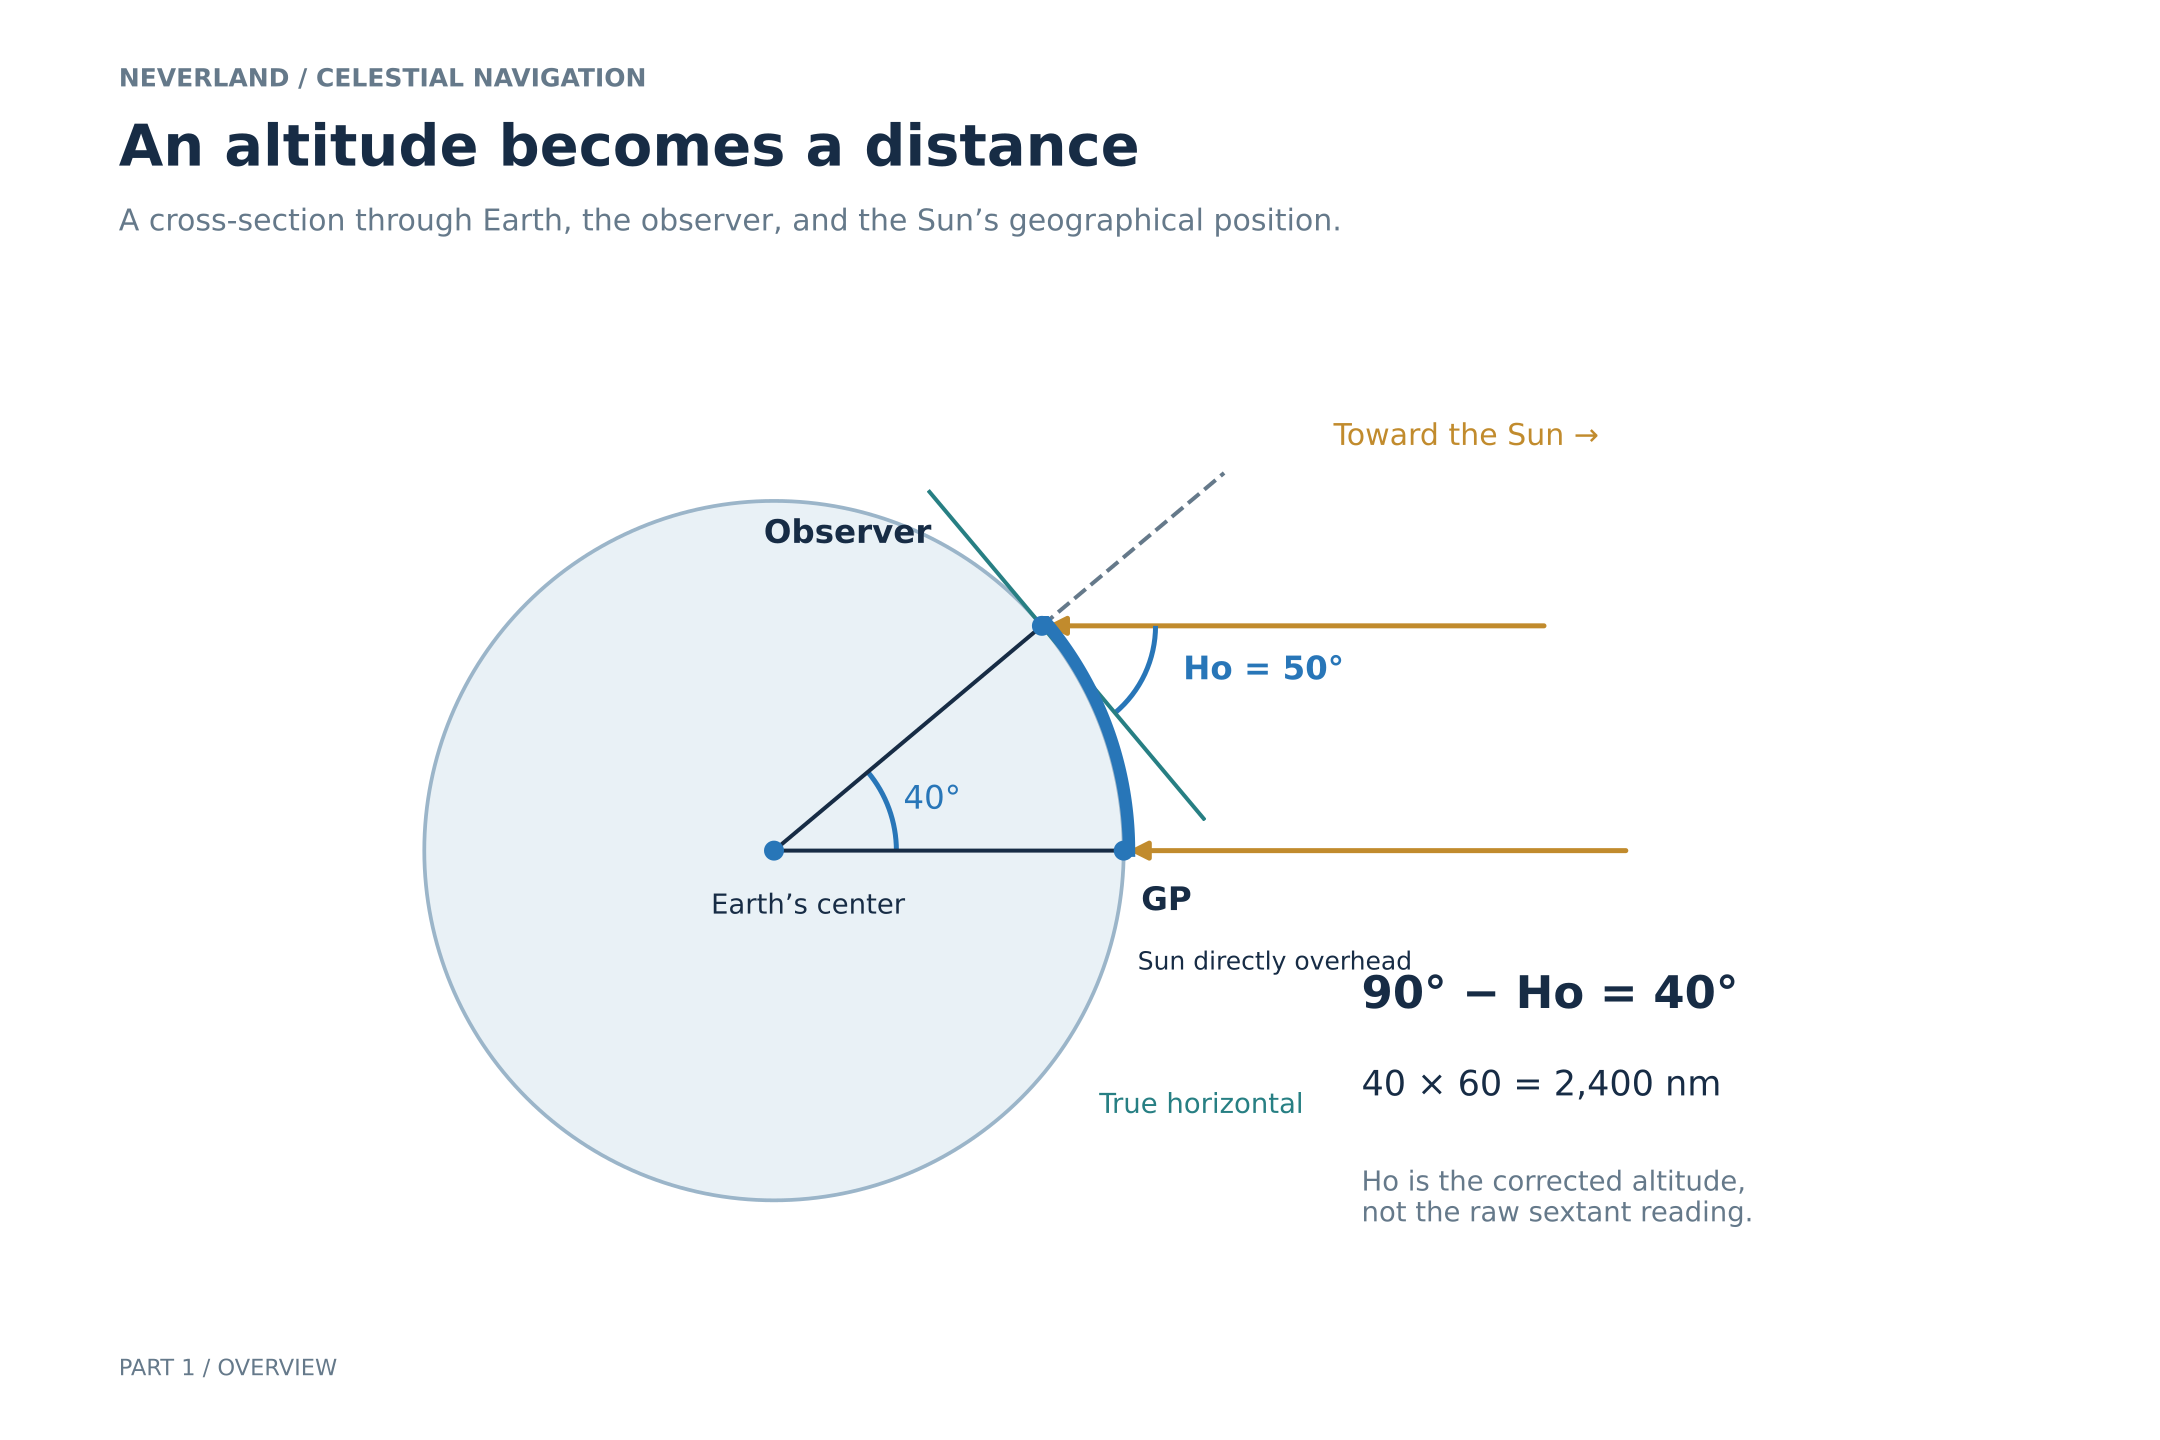
Imagine standing at the Sun's GP. It would be directly overhead, at an altitude of 90°. Here, altitude means the angle above the horizon, not a height in feet or meters.
Move away from the GP and the Sun appears lower in the sky. The angle missing from that overhead 90° is called the zenith distance: the angle between straight up and the Sun. In our spherical-Earth picture, it is also the angle at Earth's center between our position and the GP.
Remember how one minute of latitude corresponds to about one nautical mile along the surface? The same angle-to-distance rule applies to this great-circle arc from us to the GP. Every minute of zenith distance represents about one nautical mile. This is the connection we need: an angle measured in the sky tells us a distance along Earth's surface.
Why the rays are parallel in the diagram
The Sun is so far away that Earth's diameter is tiny compared with the distance to it. Sunlight reaching different places on Earth therefore travels in almost the same direction, so we draw those rays as parallel for this explanation. They are not perfectly parallel; the small remaining effect, called parallax, can be accounted for in a full sight reduction, but is often left out of sun sights without introducing much error.
That near-parallel geometry is what connects the angle at the observer to the angle at Earth's center. The diagram's observed height Ho is the corrected altitude used in that geometry. Before going further, we need to be clear about what that correction involves.
What the sextant actually measures
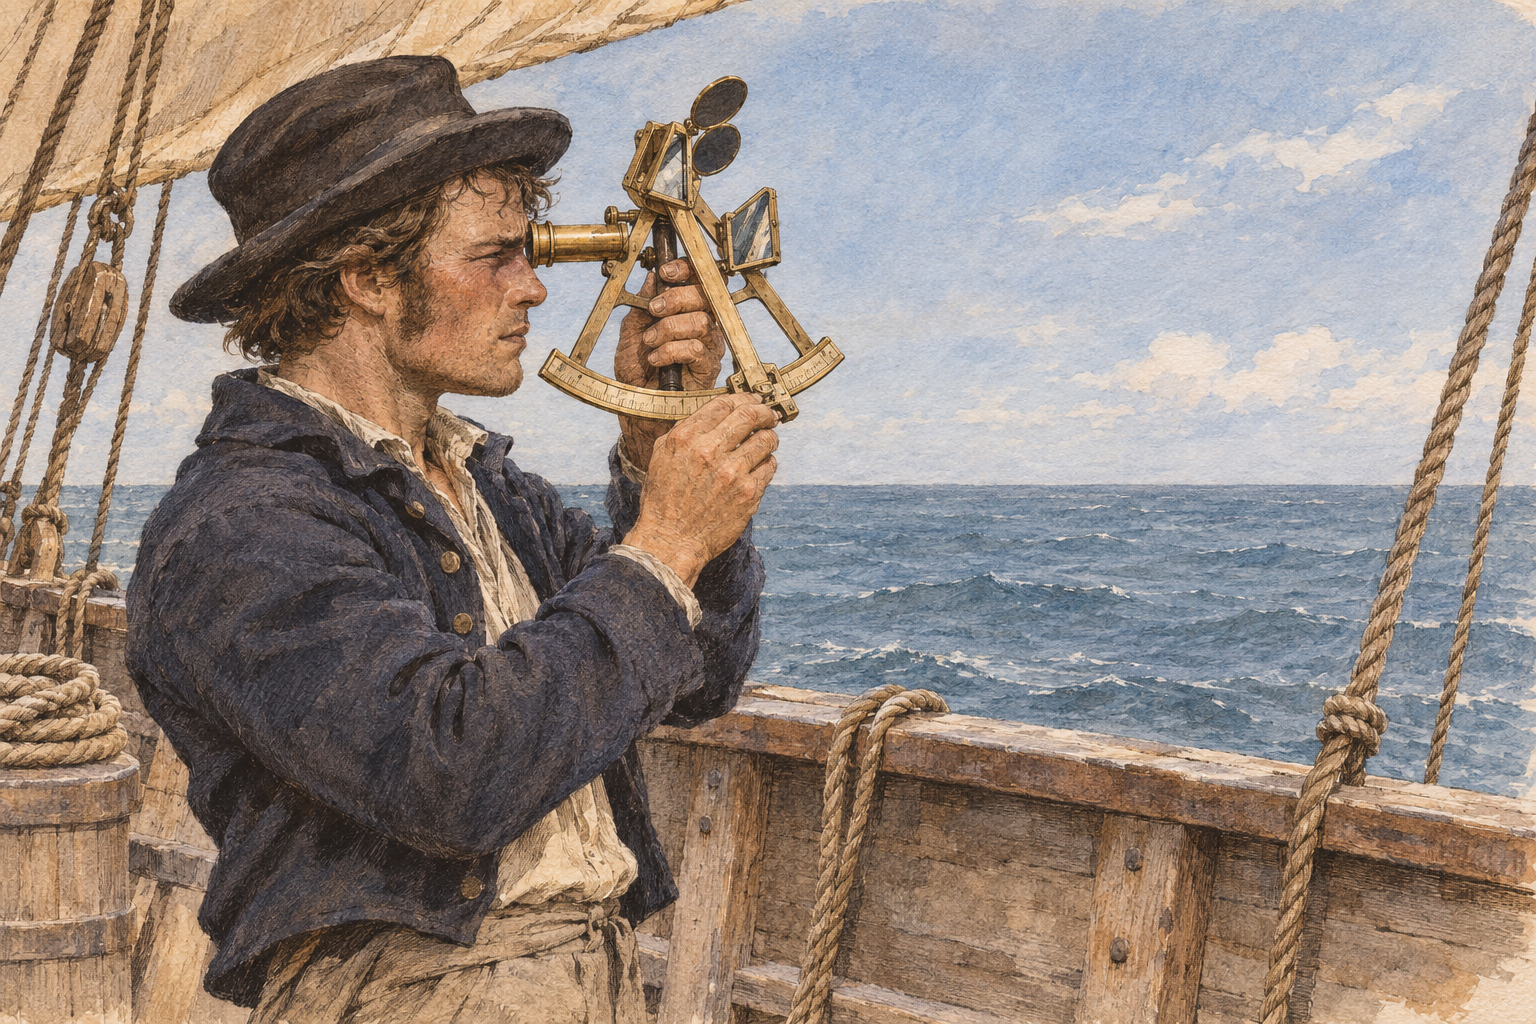
The sextant measures an angle between the visible sea horizon and the Sun. A common Sun sight brings its lower edge, or lower limb, down to the horizon. The angle read directly from the instrument is Hs, the sextant altitude. That is our starting measurement.
Ho, the observed altitude used in sight reduction, is Hs after the necessary corrections to take into account the height we are observing from and the atmosphere.
These corrections are necessary because the conditions of the observation differ from the geometry in our diagram. Our eyes are above sea level, so the visible sea horizon sits below our true horizontal. The atmosphere bends the light. We observed the Sun's bottom edge, not its center. The sextant may also have a small zero error. The corrections account for these effects, along with the small parallax correction. We will work through them in Part 2. For now, remember: Hs is the reading; Ho is the corrected angle that belongs in the diagram.
One sight gives us a circle
If our corrected altitude, Ho, tells us our distance from the GP, we could still be anywhere at that distance around it. Everyone seeing the same corrected altitude at the same instant lies on a circle of equal altitude. We know which circle we are on, but not where we are around it.
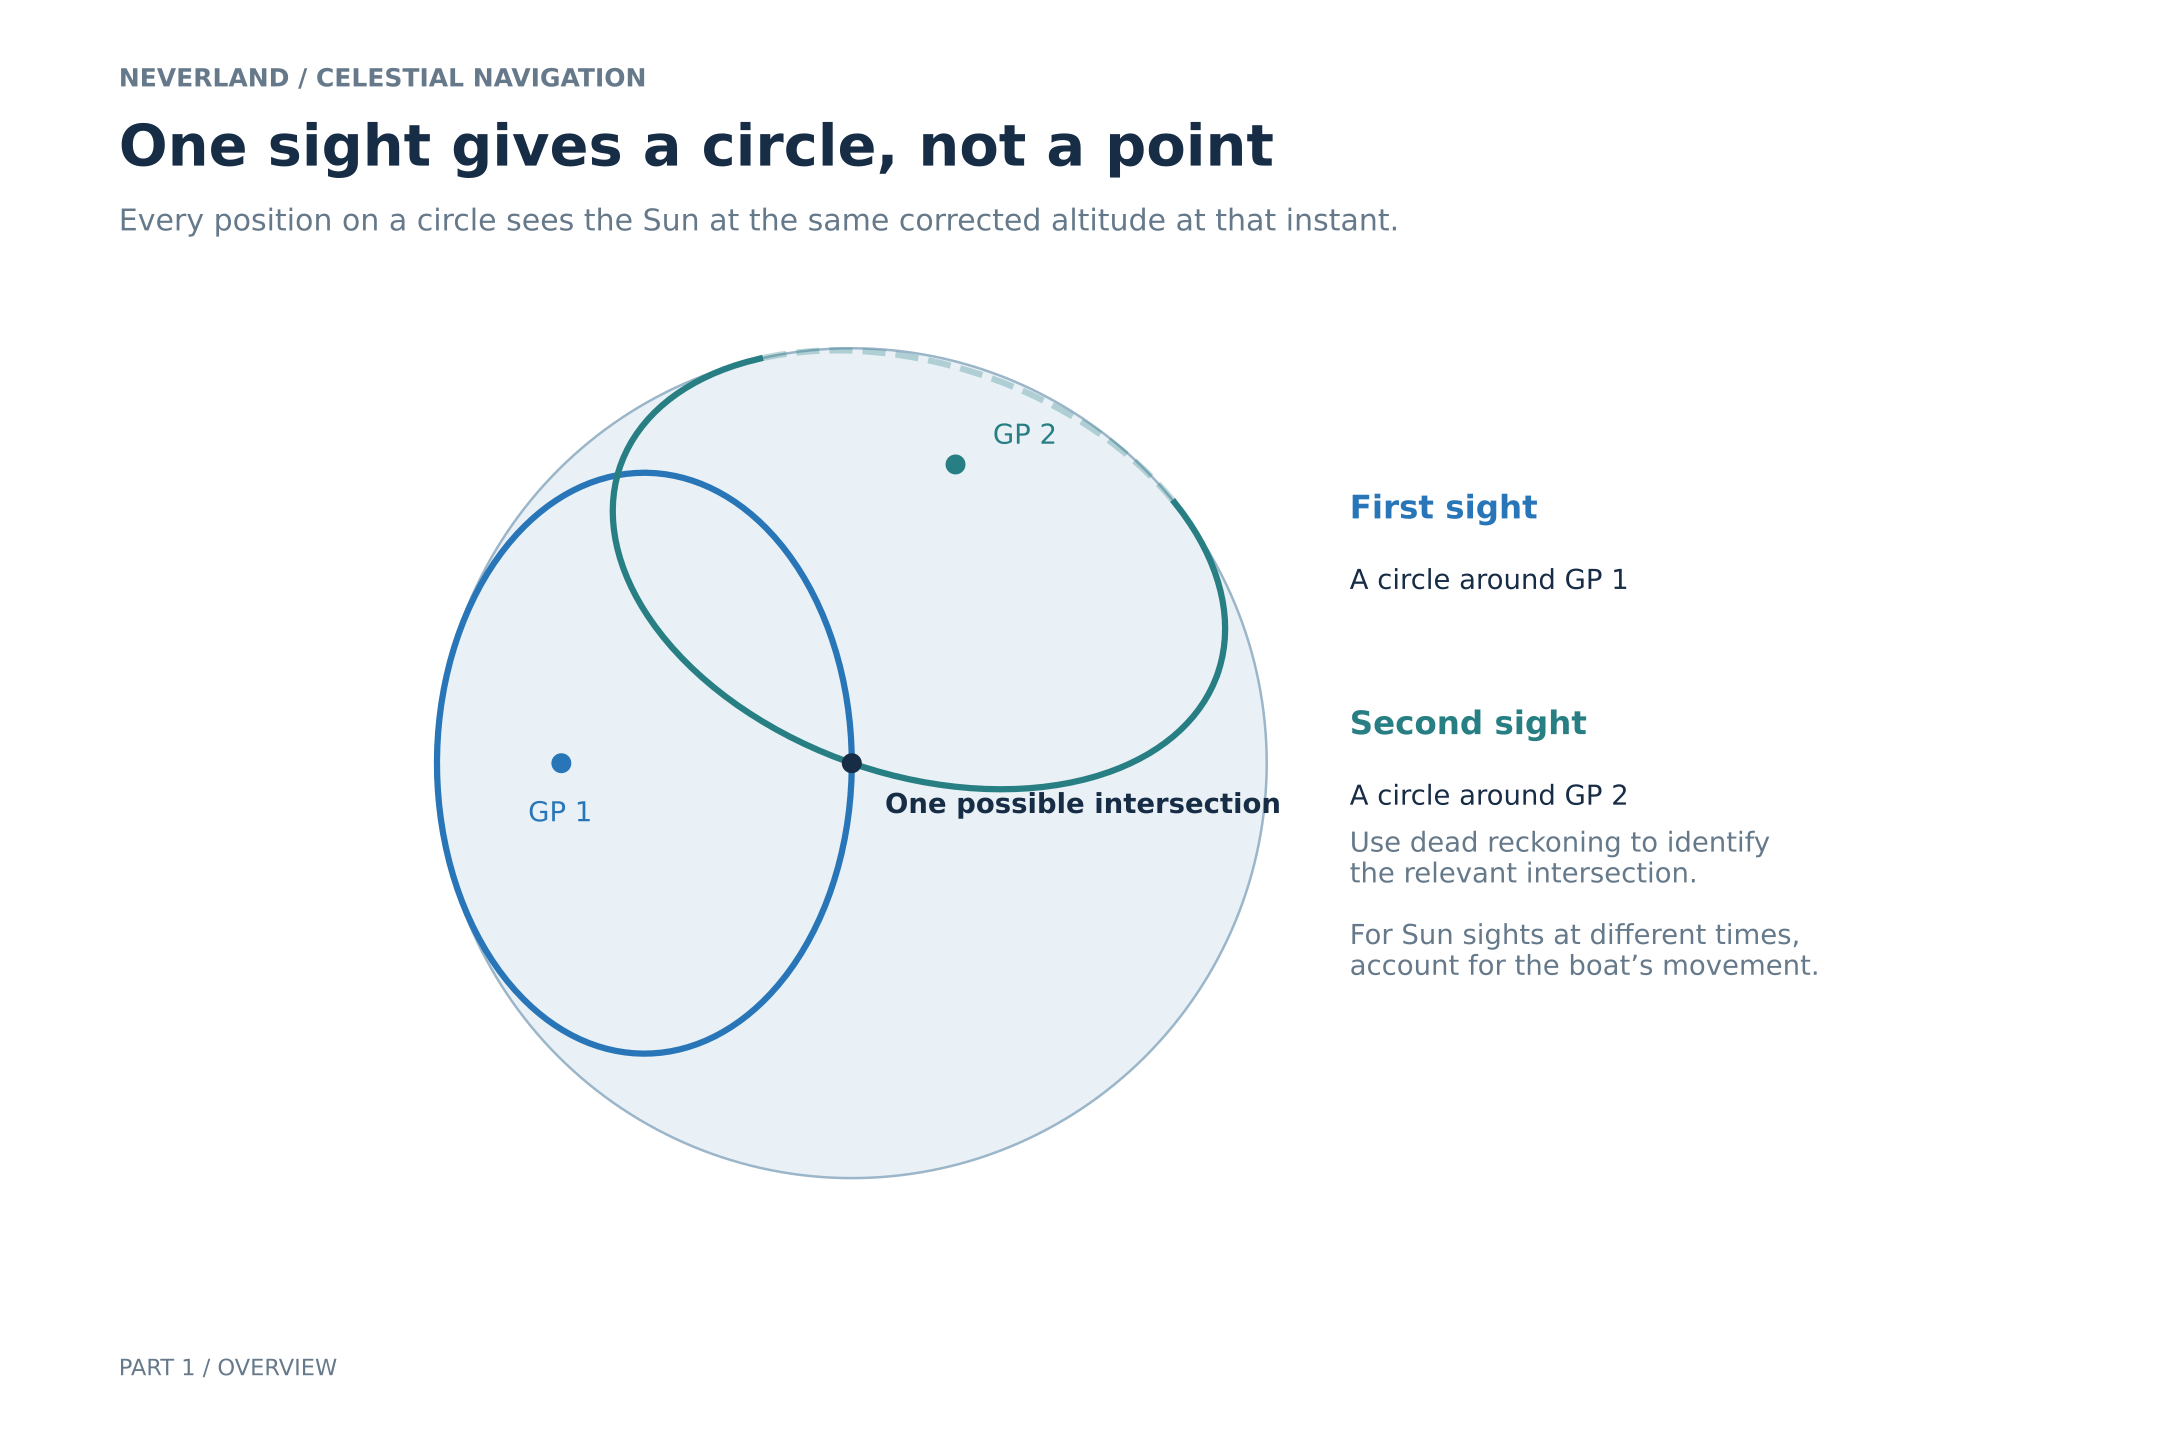
A second observation can narrow things down to the circles' intersections. Our approximate position helps us choose the relevant one. This drawing shows the geometry; if we move between sights, we need to account for that movement before combining them.
Recording the time and observing the horizon
The Sun's GP keeps moving, so we record the sight's date and time in Coordinated Universal Time, UTC, to match it with the almanac. UTC used to be called Greenwich Mean Time (GMT), but then the French got uppity about it, so we have not only a new acronym but one that doesn’t directly translate from any language. An accurate time is just as much a part of the observation as the sextant reading, so having a watch with exact time, like one set with GPS timing, or figuring out the rate at which your watch drifts away from UTC, is critical.
A sharp, identifiable horizon gives us a better reference than a hazy or misleading one. Careful arithmetic cannot rescue a poor observation or the wrong time.
From a circle to a line of position
Over the small patch of ocean around the boat, our circle of equal altitude looks nearly straight. We use that local approximation as a line of position, or LOP. The sight places us somewhere along it, within the uncertainties of the observation and reduction.
We usually already have a rough idea of where we are. Our last known position, course and distance traveled give us a dead-reckoning position, or DR. For the calculations, we choose a convenient nearby assumed position, or AP.
The AP is a reference point, not necessarily our actual position. We calculate how high the Sun would appear from there, then compare that prediction with our corrected observation to place the LOP. We will work through this in future posts, but that’s the basic premise.
From lines to a fix
Since we have flattened the earth down into two dimensions, two suitably crossing LOPs give us a fix of both latitude and longitude, an estimated position consistent with both observations. A shallow crossing gives us a less useful intersection than a more distinct one.
With Sun sights, we usually wait for the Sun's direction to change enough to give us a useful second line. We must account for any boat movement between observations. We carry the earlier LOP forward using our estimated movement before crossing it with the later line. That is a running fix, and it inherits uncertainty from our movement estimate as well as from the sights.
More observations help us judge consistency, but the lines rarely meet at one perfect point. Celestial navigation works alongside sound dead reckoning, chart work and the other information available aboard.
Where we go next
The time locates the Sun's GP. The corrected altitude tells us how far we are from it. That distance gives us a circle, and a small piece of that circle becomes a line of position and half of the puzzle. Do that again, and we get the whole picture.
In Part 2, we will take a Sun sight and work through a sight reduction using an easy-to-follow worksheet. Part 3 will cover plotting an LOP and combining sights into a running fix. From there, we can learn how to take a special noon sun sight to find our latitude and to use other celestial bodies instead of the sun.
Next in the series: Part 2: Turning sunshine into math (working a Sun sight)